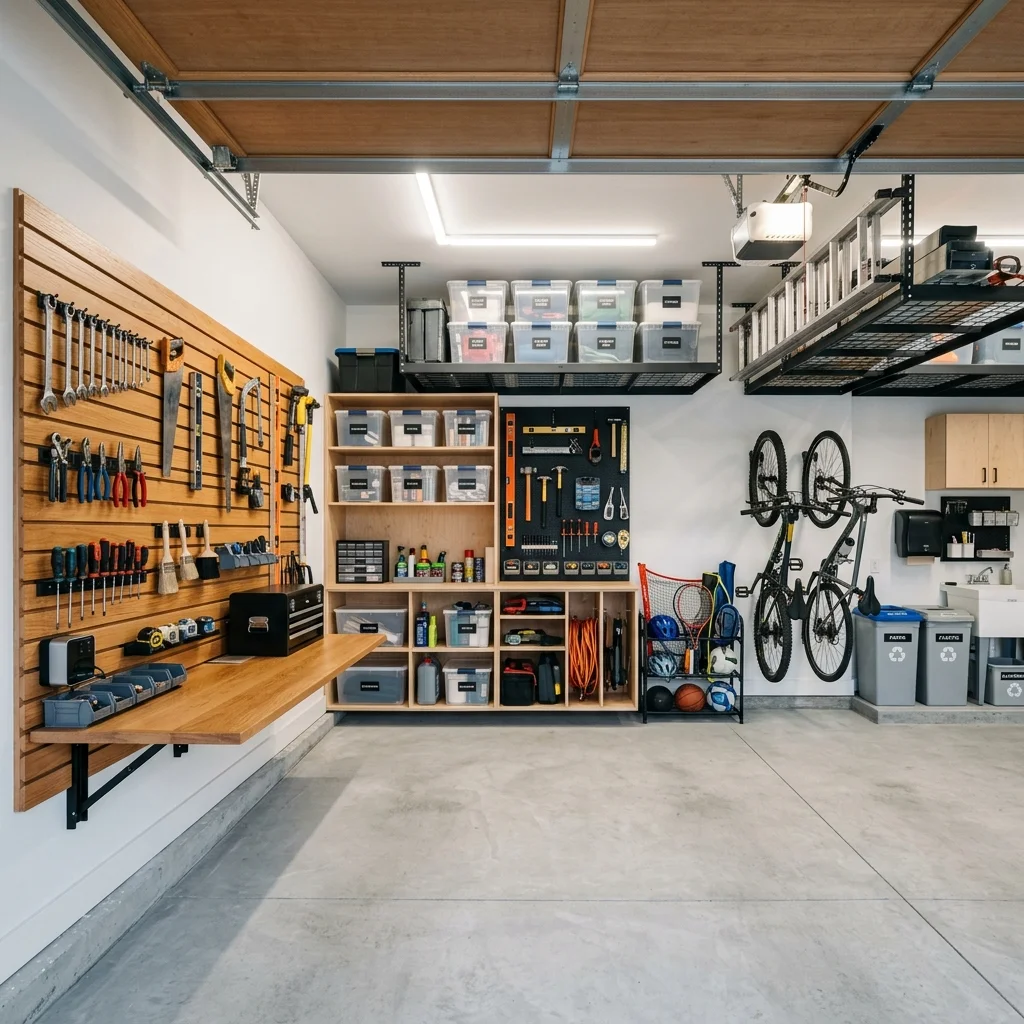
18 DIY Garage Organization Ideas to Maximize Every Inch
Introduction
The truth is, a cluttered garage can be overwhelming. DIY garage organization is key to maximizing every inch of this often-underutilized space.
Most people miss the opportunity to turn their garage into a functional area that complements their lifestyle. For instance, a well-organized garage can increase a home’s value by up to 5%.
To get started, you’ll need some basic materials and tools, such as a tape measure, level, and drill. The skill level required for these projects varies, but most can be completed by a beginner with some patience and dedication. On average, each project takes around 2-5 hours to complete, depending on the complexity and the individual’s DIY experience.
Here, we’ll explore 18 DIY garage organization ideas that will help you create a space that’s both functional and visually appealing. From simple shelving units to complex storage systems, these ideas will guide you through the process with numbered steps and detailed instructions.
Slatted Wall Organizer
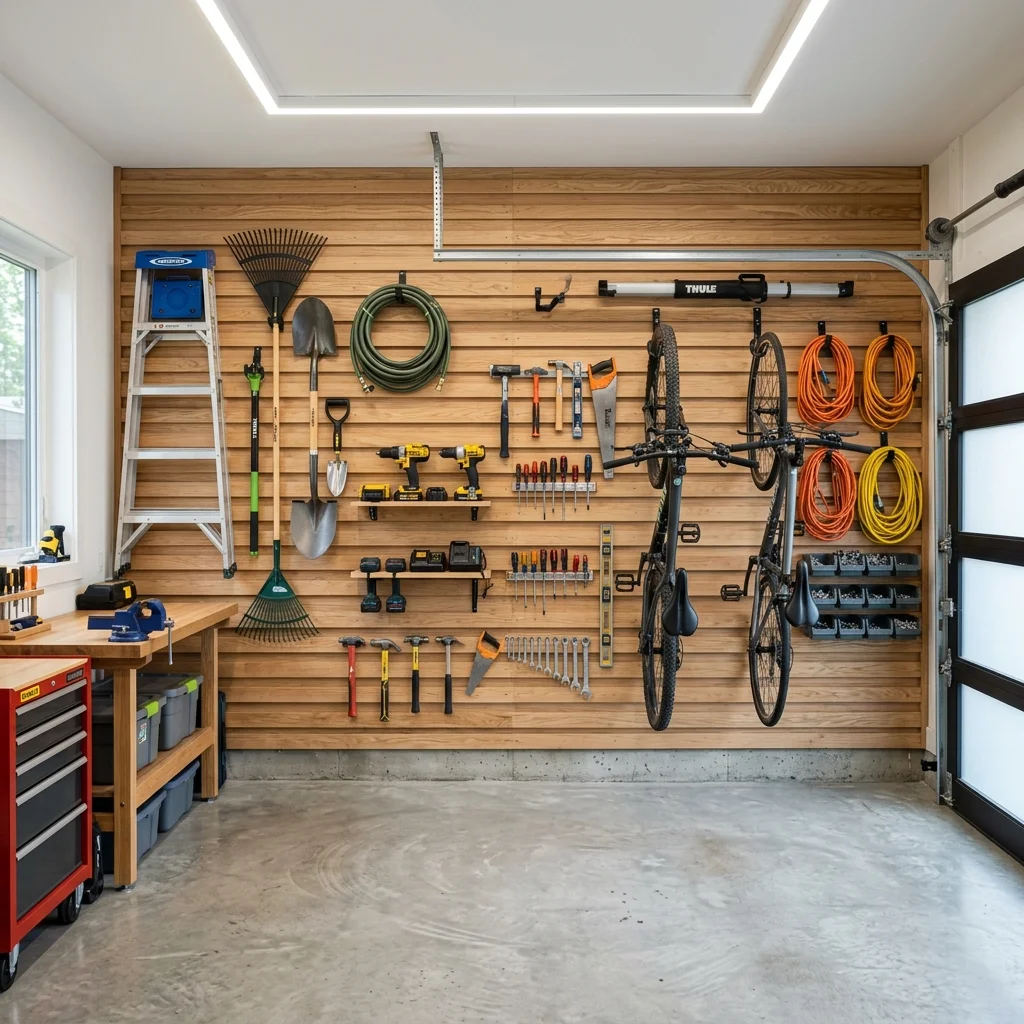
The truth is, a well-organized garage starts with a solid plan.
Consider a slatted wall organizer, perfect for hanging bikes, tools, and accessories.
This project requires a moderate skill level and can be completed in about 4-6 hours.
To get started, gather the following materials and tools: 2″ x 4″ lumber, 3/4″ plywood, wood screws, drill, impact driver, and a level.
You’ll also need a tape measure, pencil, and safety glasses.
Here are the steps to follow:
-
- Measure and mark the wall for the slats
- Cut the 2″ x 4″ lumber to the desired length
- Assemble the slats using wood screws
- Attach the slats to the wall, ensuring they’re level and secure.
For example, a 4′ x 8′ wall can accommodate 8-10 slats, providing ample storage for your garage.
Utilize Overhead Storage with DIY Garage Shelves
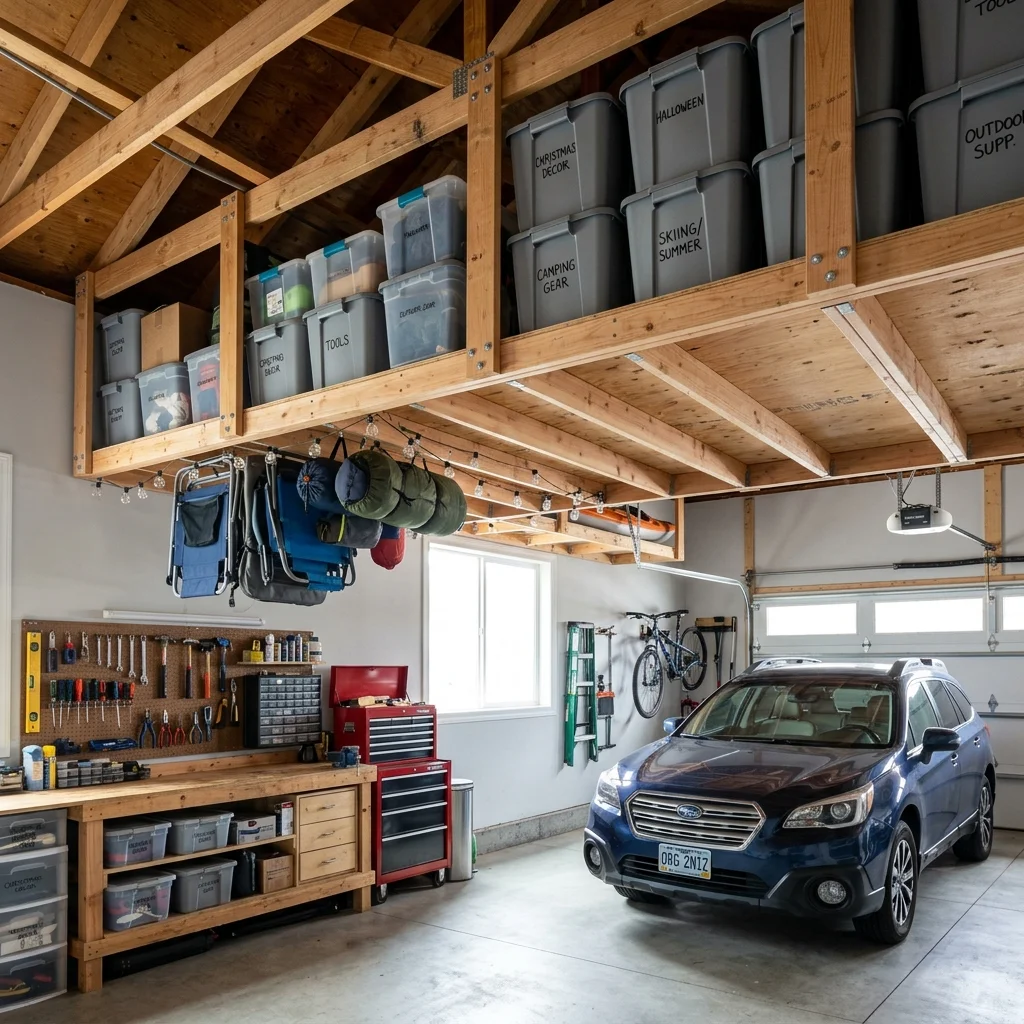
To maximize your garage’s vertical space, consider installing overhead storage. This project requires a moderate skill level, as it involves working with power tools and lifting heavy materials.
You’ll need: 2″ x 4″ lumber, 3/4″ plywood, wood screws, drill, impact driver, and a ladder.
Most people miss the opportunity to use their garage’s ceiling for storage.
The truth is, DIY garage shelves can be built in about 4-6 hours, depending on the size of your project.
Here’s a step-by-step guide:
-
- Plan your shelf design and take measurements
- Cut the lumber and plywood according to your plan
- Assemble the shelves using wood screws
For example, a 4′ x 8′ shelf can hold up to 50 pounds of storage bins and boxes, keeping your garage floor clutter-free.
Utilize Vertical Space with a Pegboard
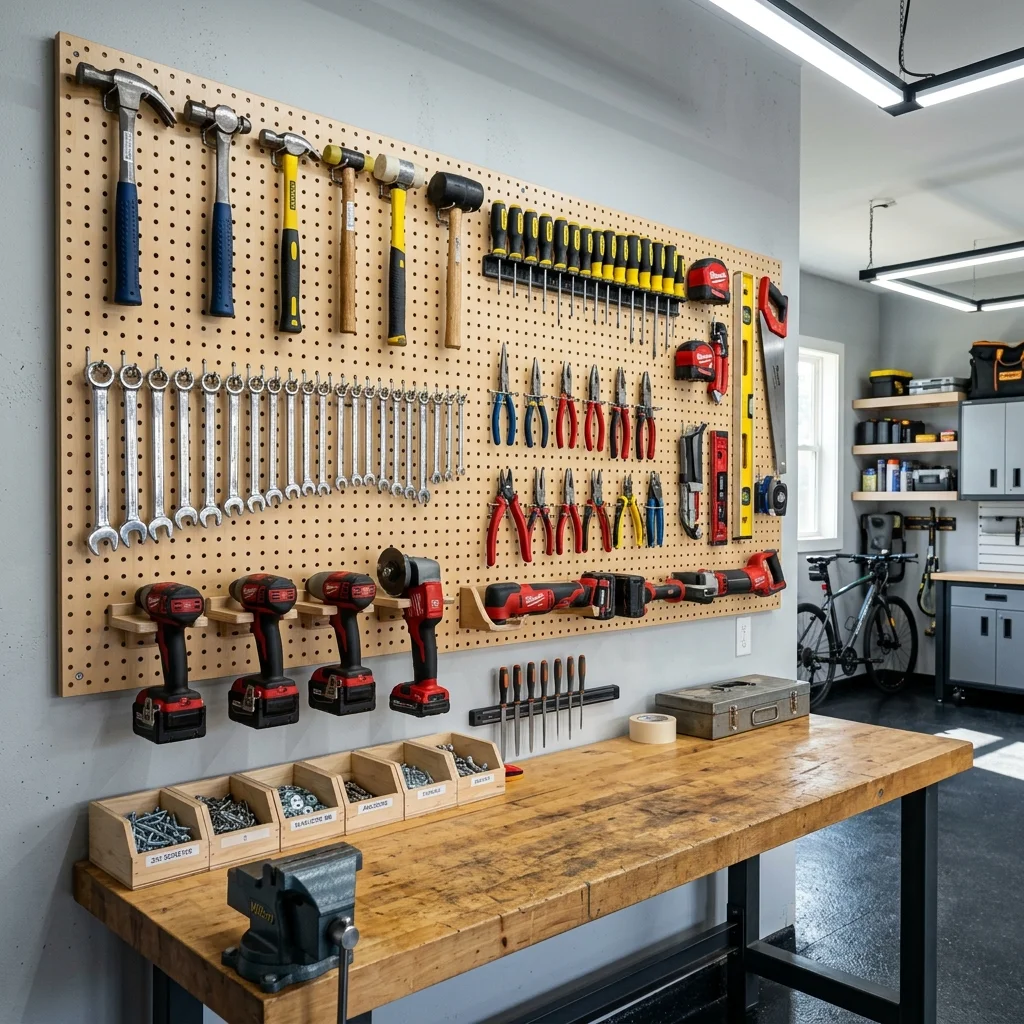
To maximize your diy garage organization efforts, consider installing a pegboard. This is a great way to keep frequently used tools and accessories within easy reach.
The truth is, most garages have a lot of unused vertical space that can be leveraged for storage.
A pegboard can be installed using basic tools like a drill, level, and hammer.
You’ll need materials such as a pegboard, pegboard hooks, screws, and a wall anchor.
This project requires a medium skill level and can be completed in about 2-3 hours.
Here’s a step-by-step guide:
-
- Measure the wall space where you want to install the pegboard
- Cut the pegboard to size using a saw
- Drill holes for the screws and hang the pegboard
For example, a 4×4 pegboard can hold up to 20 hooks, keeping your garage organized and clutter-free.
Utilize Overhead Storage with DIY Garage Shelves
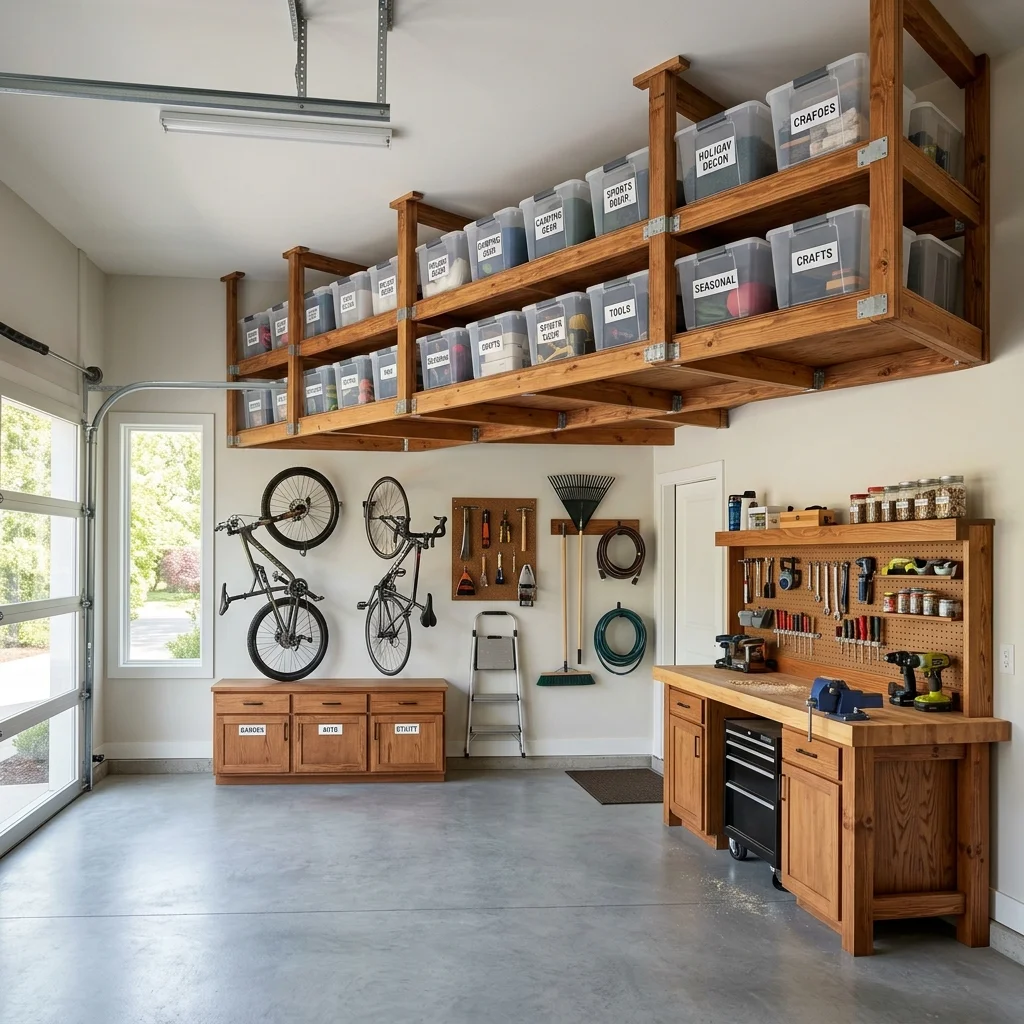
To maximize your garage’s vertical space, consider installing overhead storage shelves. This project requires a moderate diy garage organization skill level and can be completed within 4-5 hours.
You’ll need materials like 2×4 lumber, plywood, screws, and a drill.
For example, a 4×8 foot shelf can hold up to 50 pounds of storage bins and boxes.
Most people miss the opportunity to use their garage’s ceiling space.
The truth is, with the right tools and a bit of planning, you can create ample storage for infrequently used items.
Here’s a step-by-step guide:
-
- Gather materials including a drill, saw, and measuring tape
- Assemble the shelf frame using 2×4 lumber
- Attach the plywood shelf to the frame using screws
Using customizable shelving, you can keep your garage organized and make the most of your available space.
Utilize Overhead Storage with Slatted Ceiling Racks
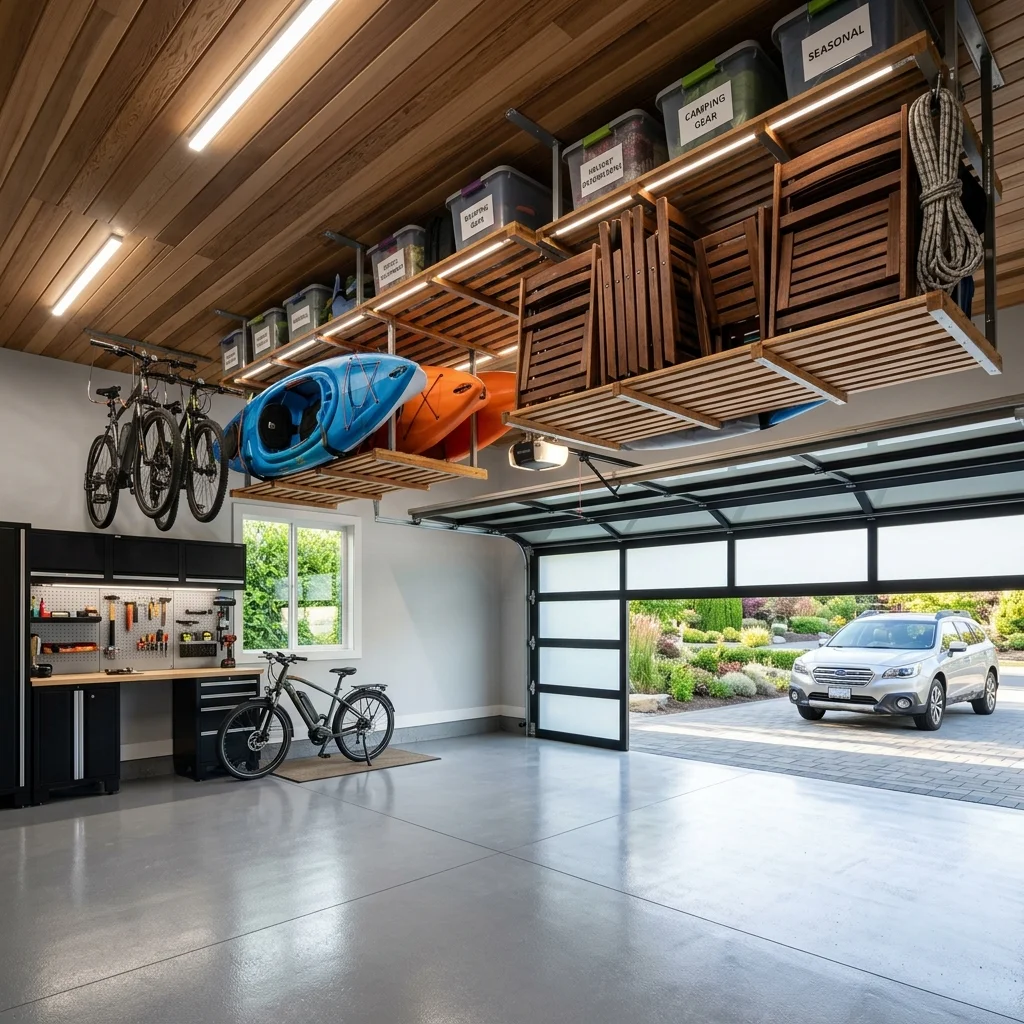
The truth is, maximizing vertical space is key to effective diy garage organization.
By installing slatted ceiling racks, you can store items like bikes, luggage, or seasonal decorations.
For this project, you’ll need a drill, saw, measuring tape, and 2×4 lumber.
To get started, gather the following materials and tools:
-
- 2×4 lumber for the rack frame
- 2×2 lumber for the slats
- Wood screws
- Drill
- Saw
- Measuring tape
This project requires a moderate skill level and about 4-6 hours to complete.
Most people miss the opportunity to use their garage ceiling for storage, but with these racks, you can double your storage space.
Overhead Storage Bins
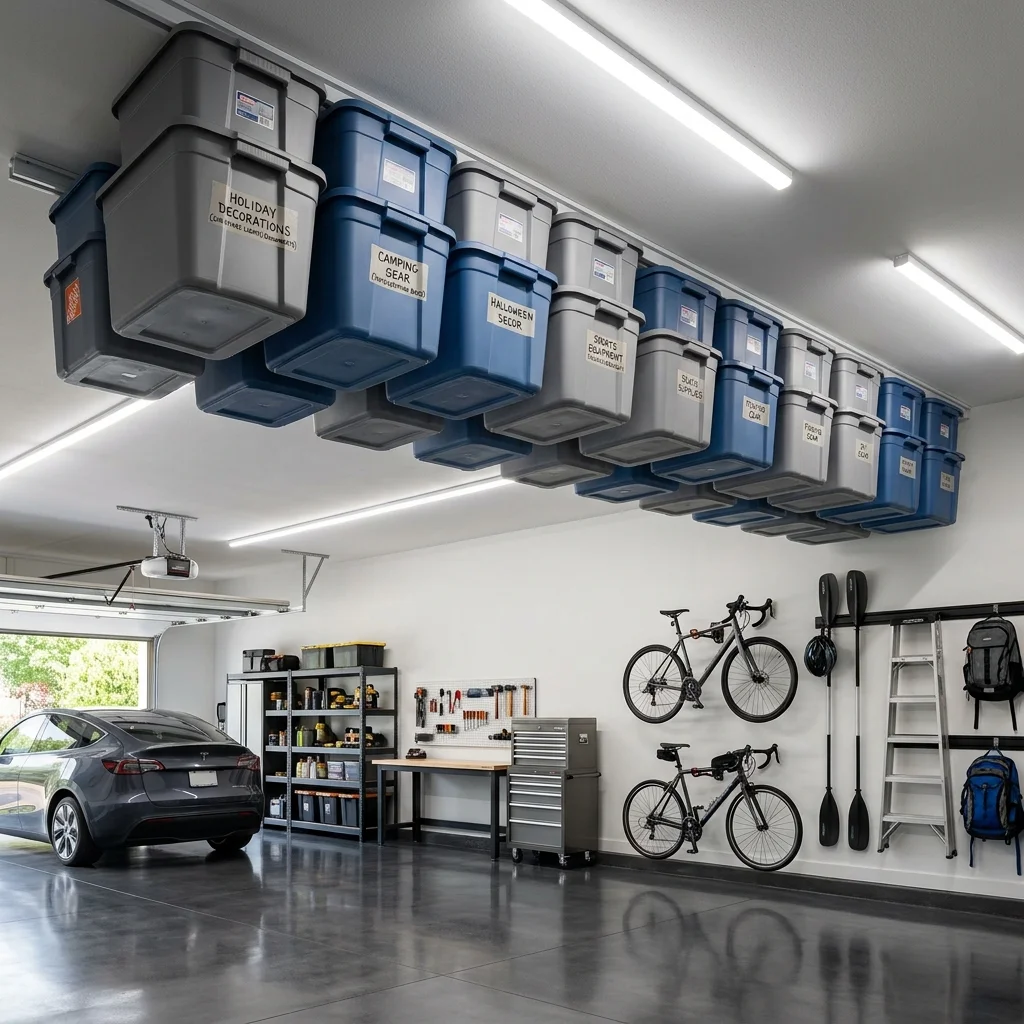
The truth is, maximizing vertical space is key to effective diy garage organization.
To create overhead storage bins, you’ll need:
-
- Plastic bins
- 2×4 lumber for the frame
- Wood screws
- Drill
- Saw
- Measuring tape
This project requires a basic skill level and about 2-3 hours to complete.
For example, you can use 3-4 plastic bins to store seasonal decorations or out-of-season clothing, keeping them dust-free and out of the way.
By following these simple steps:
-
- Measure the space
- Cut the lumber
- Assemble the frame
you can increase your storage capacity and keep your garage floor clear.
Utilize Overhead Storage with a DIY Garage Loft
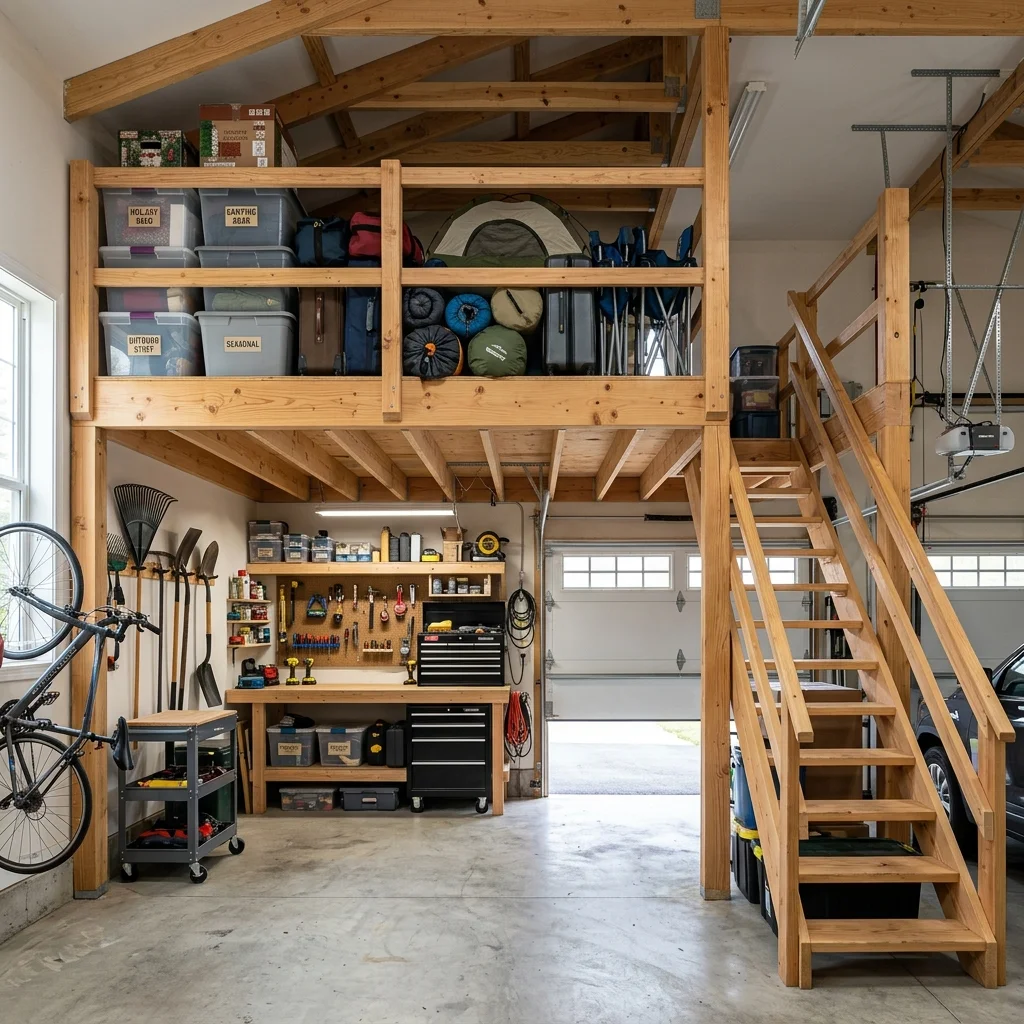
To maximize your garage’s vertical space, consider building a loft for infrequently used items, such as out-of-season sports equipment or storage containers. The truth is, most garages have unused space above the garage door or near the ceiling.
Materials needed include:
2×4 lumber, plywood, screws, and a drill.
Tools required are a saw, drill, and ladder.
This project requires a moderate diy skill level and can be completed in about 4-6 hours.
Here’s a simple 3-step process to get started:
-
- Plan your loft design
- Assemble the frame
- Install the plywood floor
For example, a 4×4 foot loft can store up to 16 plastic storage bins, keeping them dust-free and out of the way.
Utilize a Pegboard for Hanging Storage
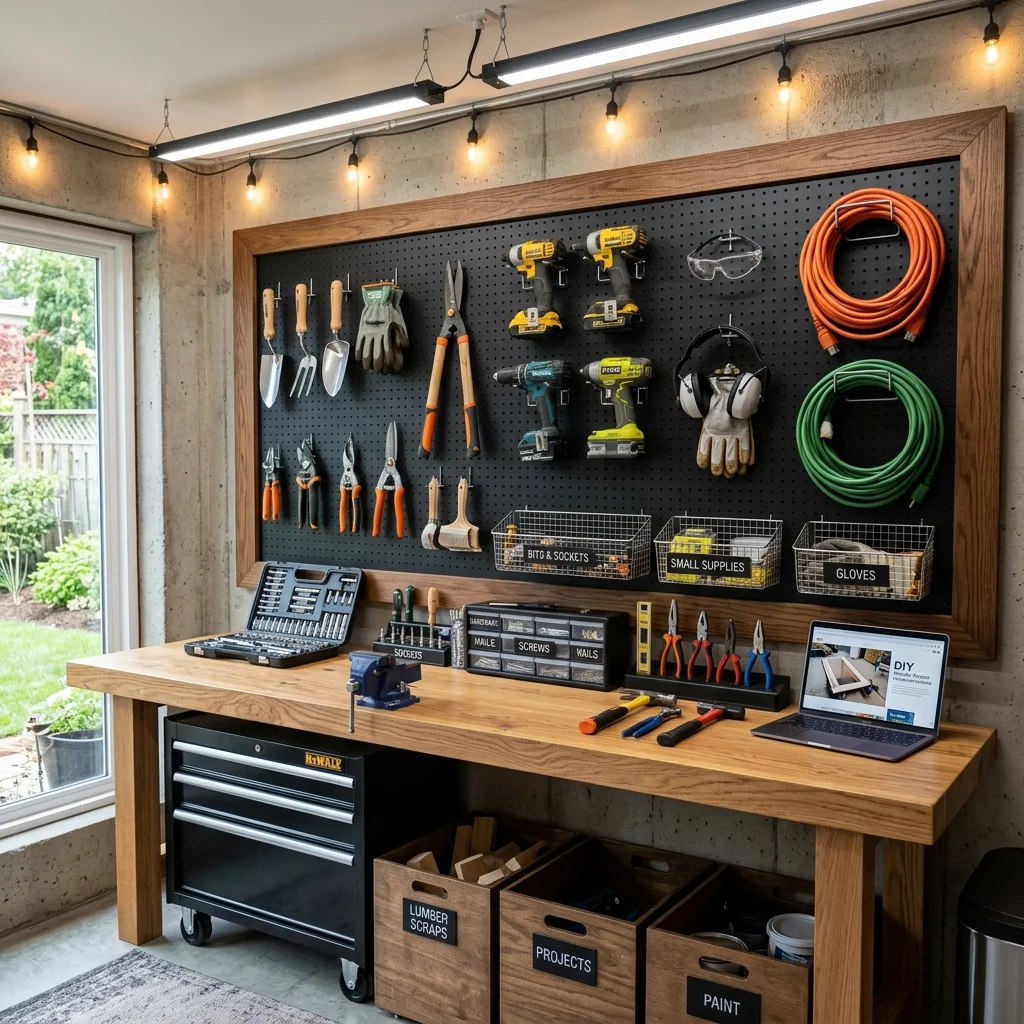
The truth is, maximum storage capacity can be achieved by using vertical space in your garage.
A pegboard is a great way to do this, as it allows you to hang tools, accessories, and other items, keeping them organized and within reach.
To install a pegboard, you will need the following materials and tools: pegboard, drill, screws, level, and a hammer.
This project requires a moderate skill level and can be completed in about 2-3 hours.
Here’s a simple 3-step process to get started:
-
- Mount the pegboard to the wall
- Install the hooks and brackets
- Hang your tools and accessories, for example, a bike hook can hold up to 50 pounds, keeping your bike secure and off the floor.
Utilize Overhead Storage with a DIY Garage Loft
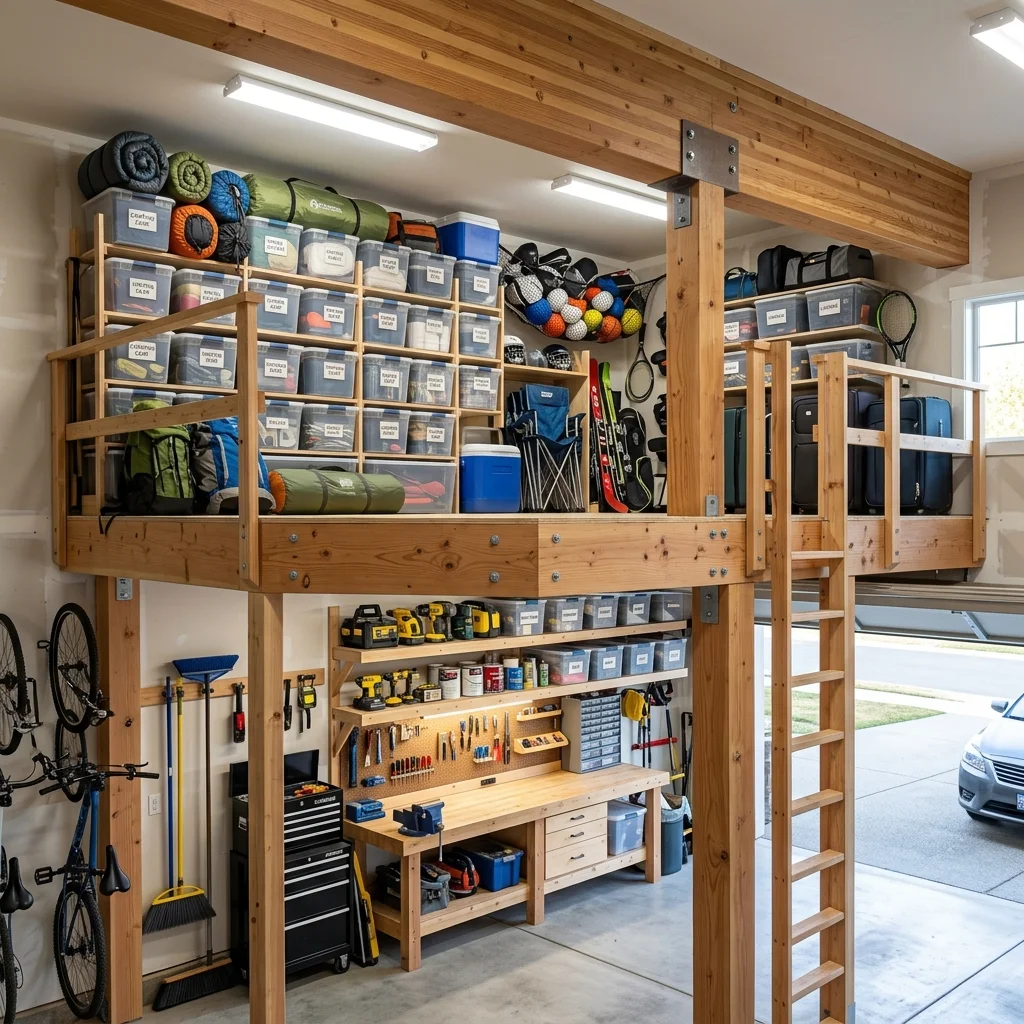
To maximize your garage’s vertical space, consider building a loft storage system. This project requires a moderate skill level and can be completed in about 4-5 hours.
You’ll need the following materials and tools: 2×4 lumber, 3/4 inch plywood, wood screws, drill, saw, and a ladder.
Most people miss the opportunity to use their garage’s overhead space.
The truth is, a well-designed loft can hold a significant amount of storage. For example, a 4×4 foot loft can store up to 16 plastic storage bins.
Here’s a simple 4-step process to get started:
-
- Plan your loft design
- Cut and assemble the frame
- Install the plywood floor
- Add storage bins and access ladder, making sure to secure the ladder to the wall for safe and easy access.
Utilize Overhead Storage with a DIY Garage Pulley System
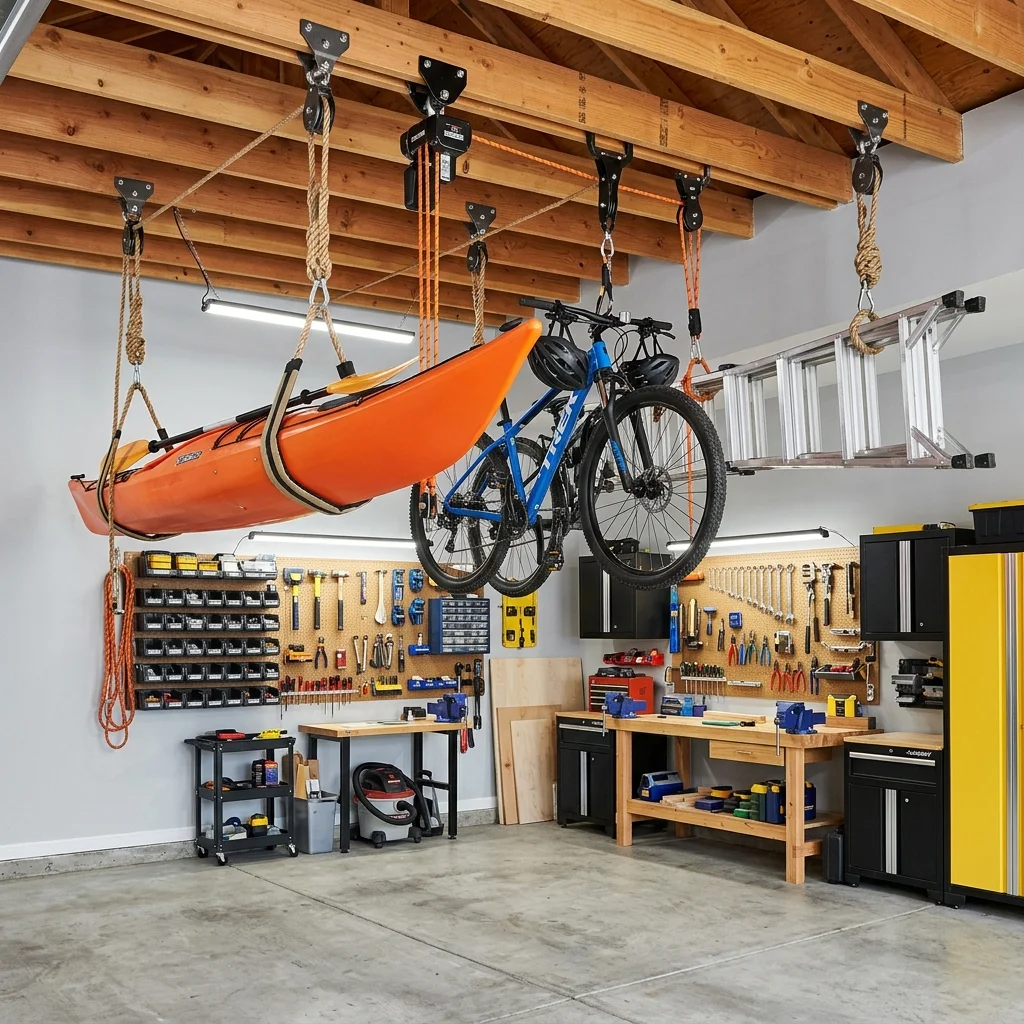
To maximize your garage storage space, consider installing a DIY garage pulley system. This clever idea allows you to store bulky items like bikes, kayaks, or lawn equipment, keeping them safe and out of the way.
The truth is, most garages have ample overhead space that often goes unused.
With a pulley system, you can easily lift and lower heavy items, making it a great option for efficient garage organization.
For this project, you’ll need:
-
- 2×4 lumber
- Pulley wheels
- Rope or cable
- Wood screws
- Drill
- Measuring tape
This is a moderately difficult project, requiring a skill level of 6/10, and can be completed in about 4-6 hours.
Here’s a simple 3-step process to get started:
-
- Plan your pulley system design
- Install the pulley wheels and rope
- Test and secure the system, ensuring smooth and easy operation.
Utilize Overhead Storage with a DIY Garage Loft
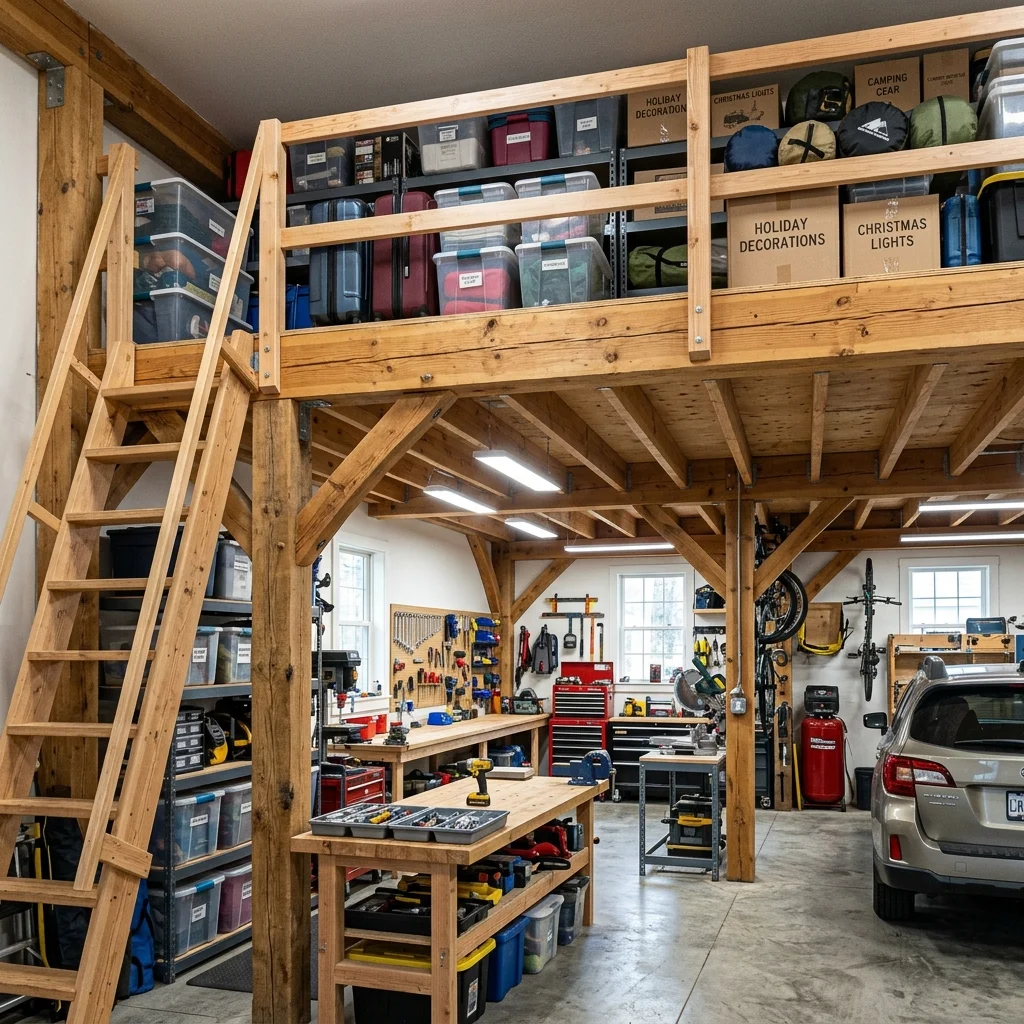
To maximize vertical space, consider building a loft in your garage. This project requires a skill level of 7/10 and can be completed in about 8-10 hours.
You’ll need materials like 2×4 lumber, 3/4 inch plywood, wood screws, and a drill.
Additionally, gather tools such as a circular saw, tape measure, and level.
Most people miss the opportunity to store infrequently used items, like seasonal decorations or out-of-season clothing, in these lofts.
For example, a 4×4 foot loft can provide approximately 64 cubic feet of storage space.
Here’s a simple 3-step process to get started:
-
- Plan your loft design and ensure it meets local building codes
- Construct the loft frame and install the plywood floor
- Add reinforced supports and finish with a coat of paint or stain, making it a functional and attractive addition to your garage.
The truth is, a well-designed loft can be a game-changer for your DIY garage organization.
Utilize Vertical Space with a Pegboard and Hooks
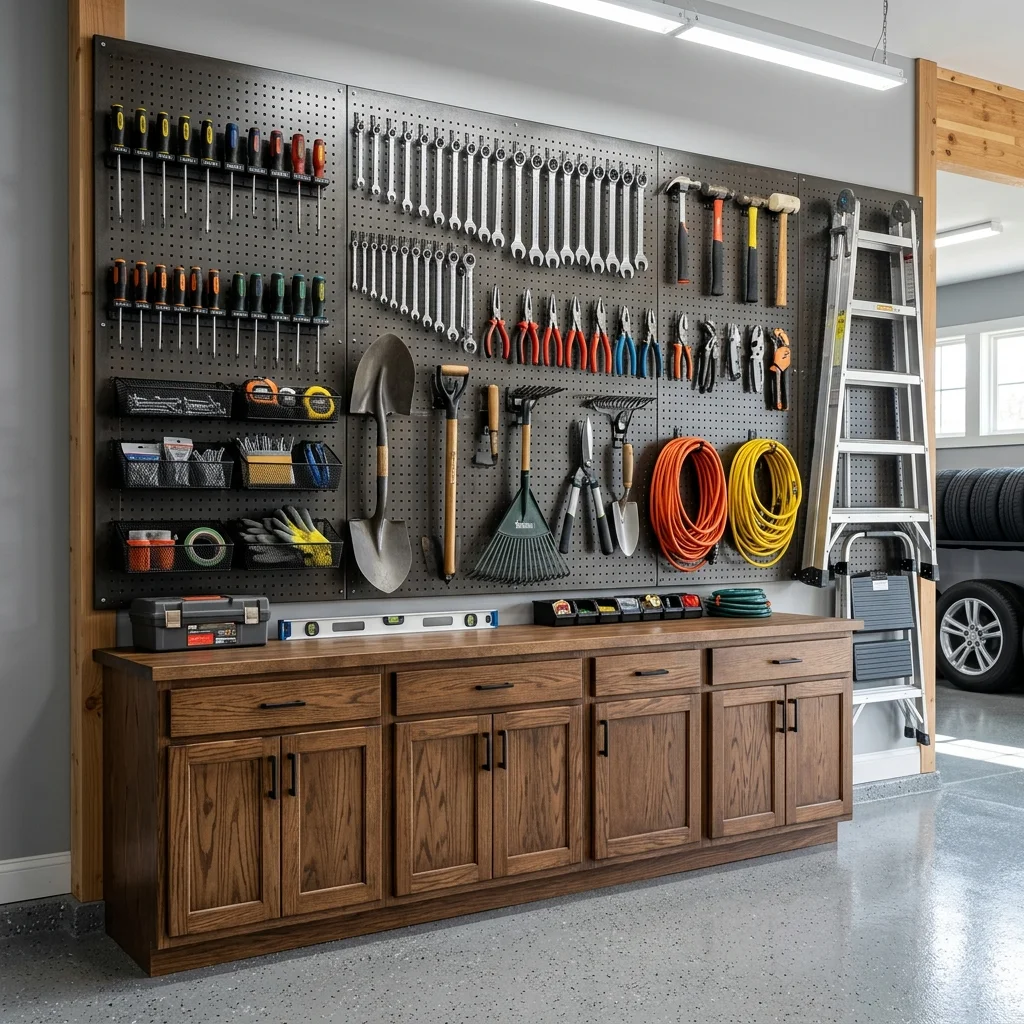
To maximize your DIY garage organization, consider installing a pegboard and hooks.
This is a simple yet effective way to keep your tools and accessories within easy reach.
For example, a 4×8 foot pegboard can hold up to 50 pounds per square foot.
Most people miss the opportunity to use their garage walls efficiently.
The truth is, a well-designed pegboard system can be a game-changer for your garage organization.
To get started, you’ll need:
-
- 1 pegboard (4×8 feet)
- 10-20 hooks
- 1 drill
- 1 level
- 1 hammer
- Nails or screws
- Wall anchors (optional)
Skill level: Beginner
Time estimate: 2-3 hours
Here are the steps:
-
- Measure and mark the wall where you want to install the pegboard
- Drill pilot holes and hang the pegboard
- Install hooks and start organizing your tools and accessories.
Utilize Overhead Storage with a DIY Garage Loft
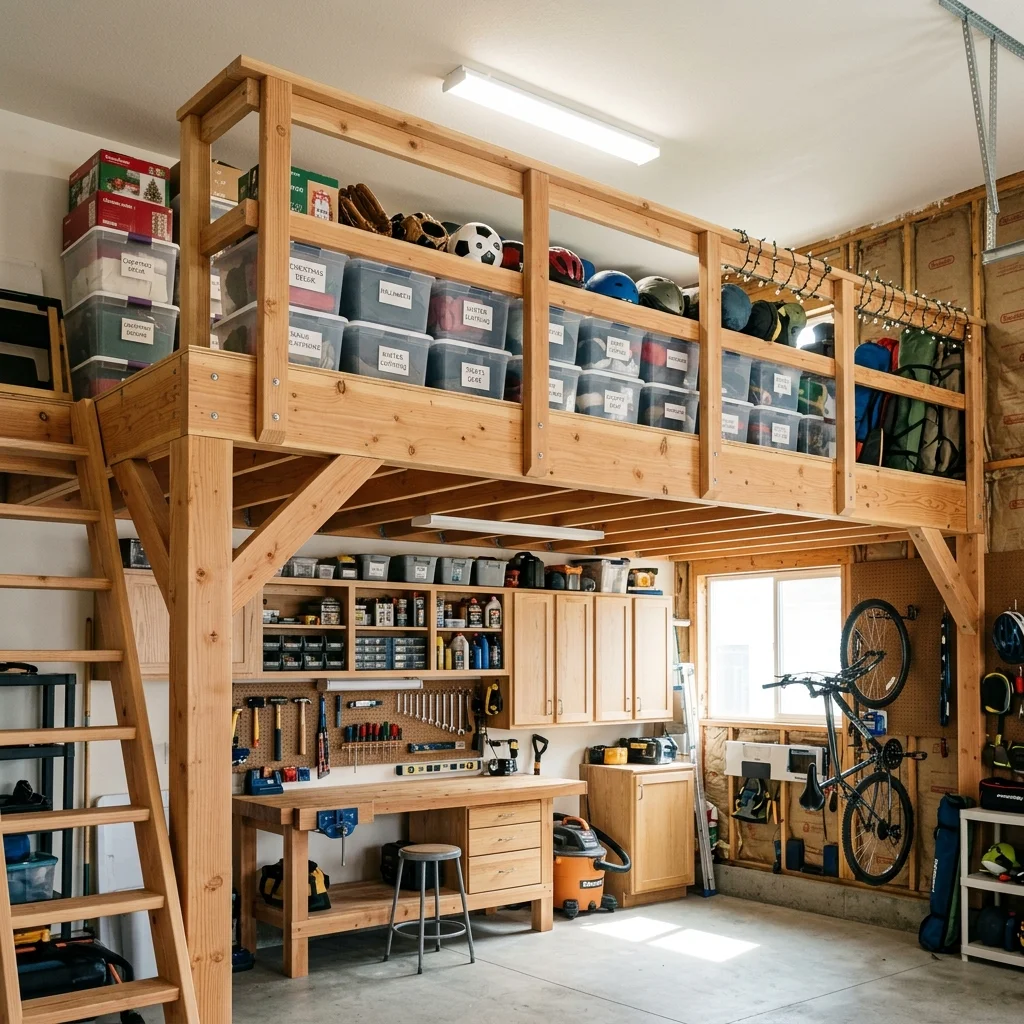
To maximize vertical space, consider building a loft in your garage. This project requires some carpentry skills, but the end result is well worth the effort. For example, a loft can be used to store seasonal decorations, out-of-season clothing, or even infrequently used tools.
Materials needed:
-
- 2×4 lumber
- 3/4 inch plywood
- Wood screws
- Nails
- Drill
- Saw
- Ladder
Skill level: Intermediate
Time estimate: 4-6 hours
Here are the steps:
-
- Plan the loft design and take measurements
- Build the loft frame using 2×4 lumber
- Install the plywood floor and add support beams.
Utilize Overhead Storage with a DIY Garage Ceiling Rack
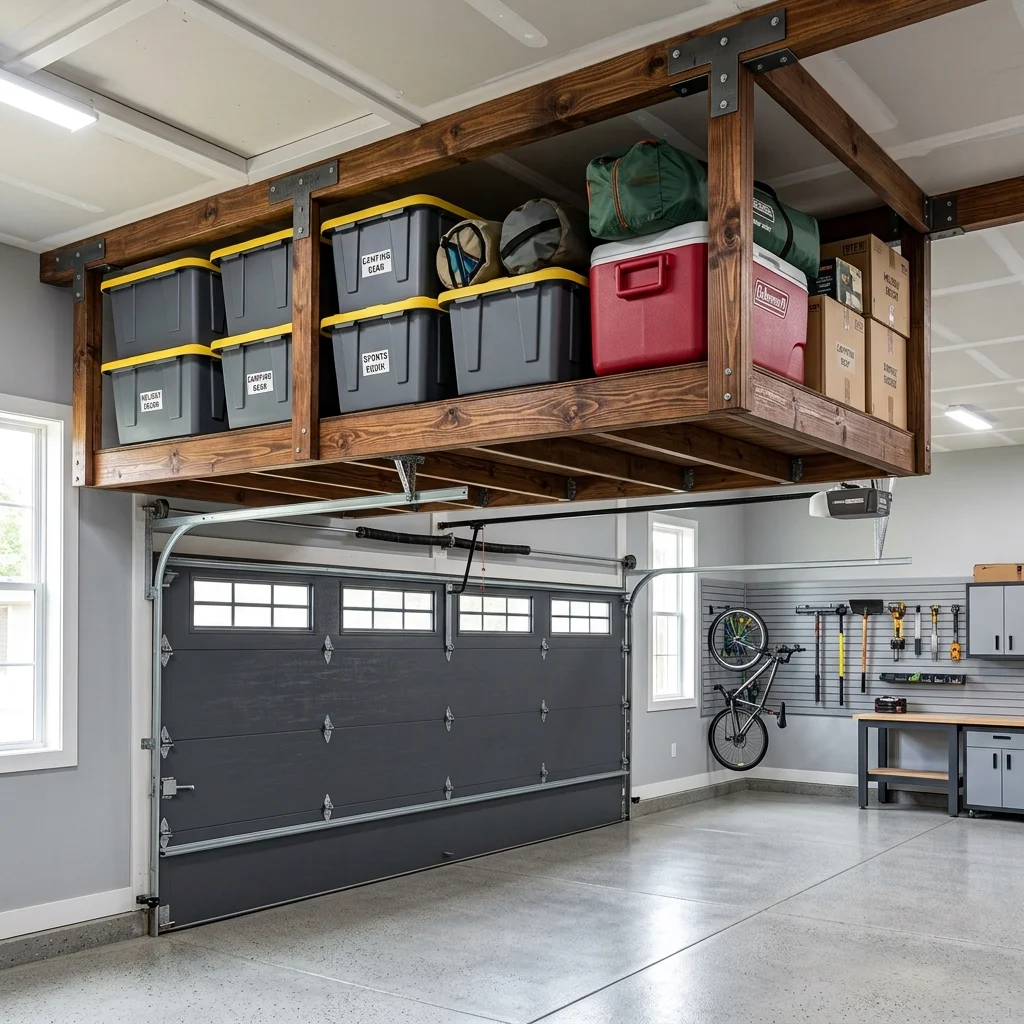
To maximize vertical space, consider installing a ceiling rack for storing infrequently used items.
The truth is, most garages have unused space above the garage door or near the ceiling.
For example, a family in California used this idea to store their seasonal decorations, freeing up floor space.
Materials needed:
-
- 2×4 lumber
- 3/4 inch plywood
- Wood screws
- Nails
- Drill
- Saw
- Ladder
- Storage bins
Skill level: Advanced
Time estimate: 6-8 hours
Here are the steps:
-
- Plan the rack design and take measurements
- Build the rack frame using 2×4 lumber
- Install the plywood shelves and add support beams
With proper installation, you can store up to 100 pounds of items per shelf, keeping your garage floor clear and organized.
Utilize Overhead Storage with a DIY Garage Loft
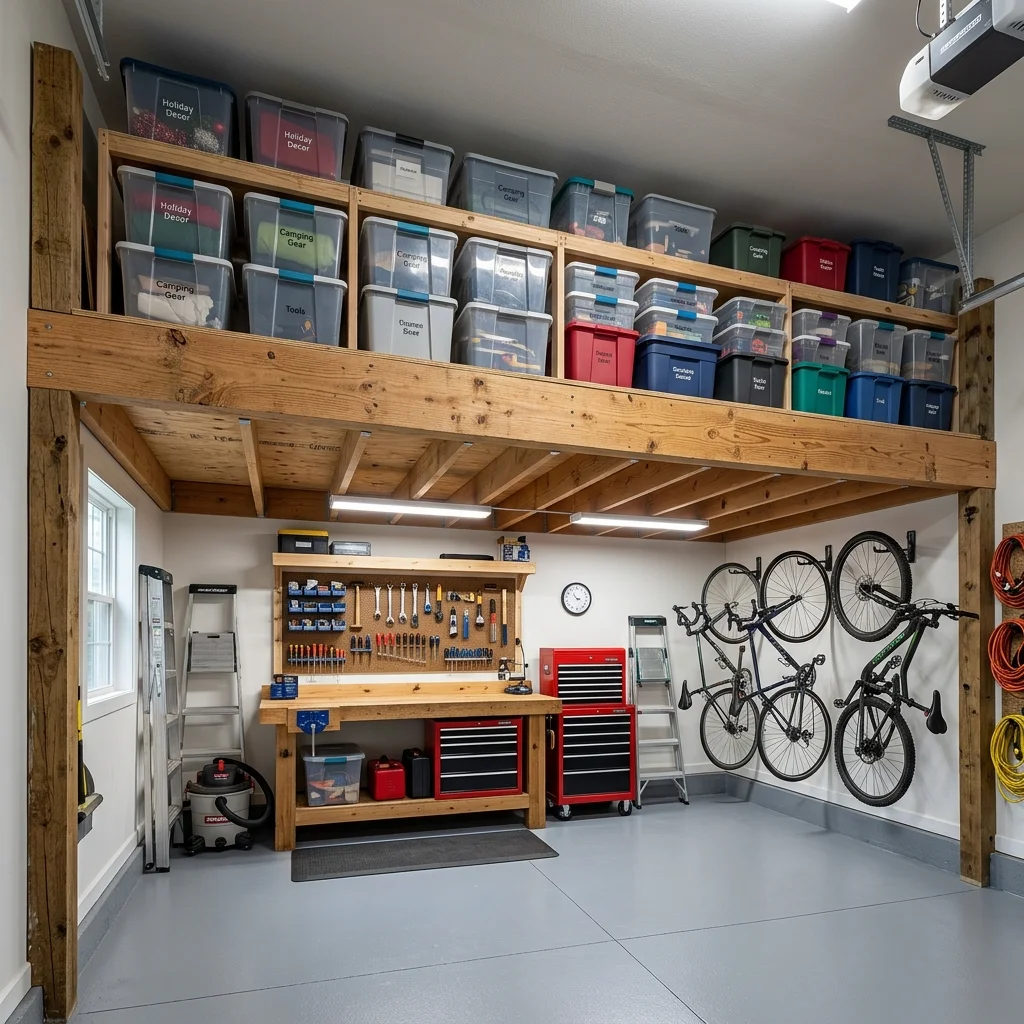
To truly maximize garage space, consider building a loft for overhead storage.
This project requires a moderate skill level and approximately 8-10 hours to complete.
With the right materials, including 2×6 lumber, plywood, and lag screws, you can create a sturdy loft.
The truth is, most garages have unused overhead space that can be leveraged for storage.
For example, a 4×4 foot loft can store up to 50 storage bins, keeping your garage floor clear.
To build a loft, you will need:
-
- 2×6 lumber for the frame
- Plywood for the floor
- Lag screws for secure attachment
- Drill and impact driver for installation
Here are the steps:
-
- Plan the loft design and take measurements
- Build the loft frame using 2×6 lumber
- Install the plywood floor and add support beams
With proper planning, you can create a functional loft that keeps your garage organized and clutter-free.
Utilize Overhead Storage with Sliding Bins
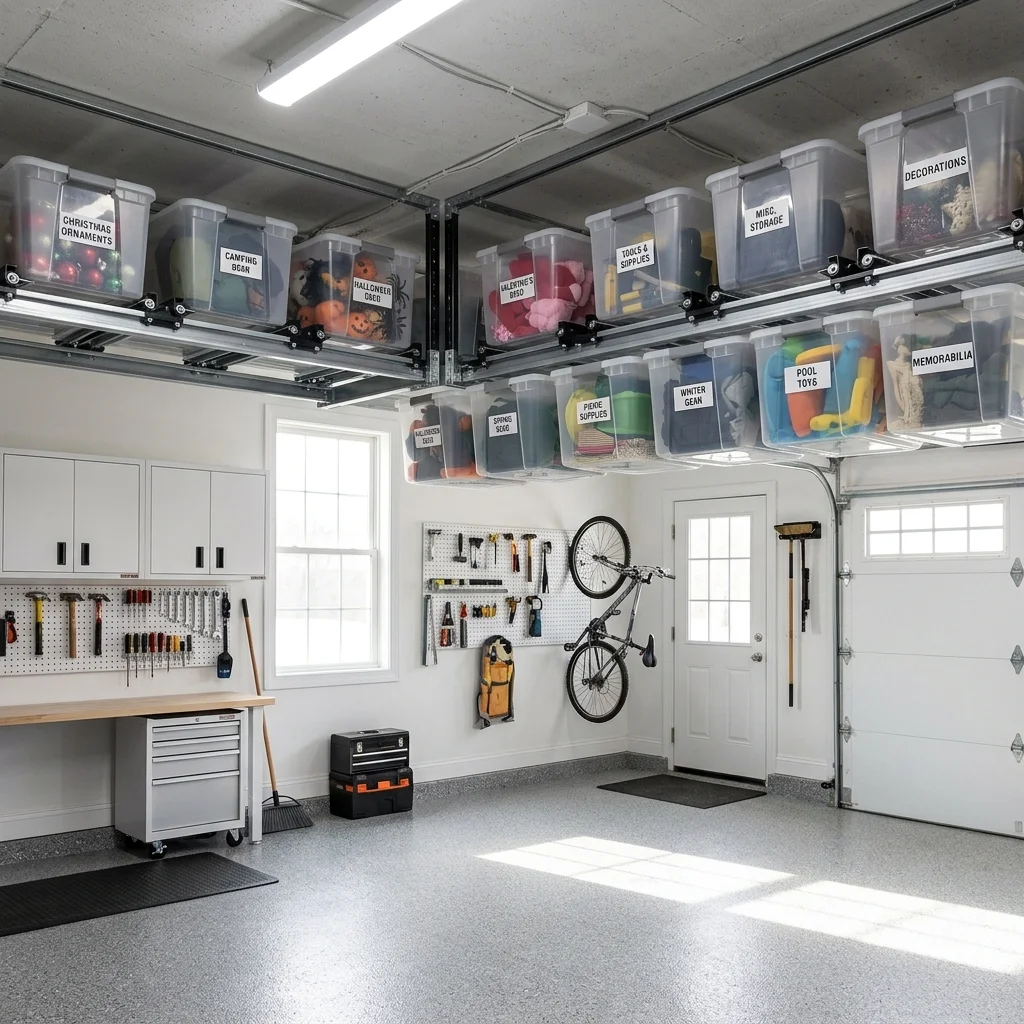
To maximize your garage’s vertical space, consider installing overhead storage with sliding bins. This diy garage organization idea is perfect for storing infrequently used items.
The truth is, most garages have unused space above the garage door or near the ceiling.
For this project, you’ll need:
-
- 2×4 lumber
- Plywood
- Sliding bin hardware
- Drill
- Impact driver
- Measuring tape
With a moderate skill level and about 4-6 hours of work, you can complete this project.
Here’s a step-by-step guide:
-
- Measure the space where you want to install the overhead storage
- Cut the 2×4 lumber to size and assemble the frame
- Attach the sliding bin hardware and add the plywood bins.
Utilize a Pegboard for Hanging Tools
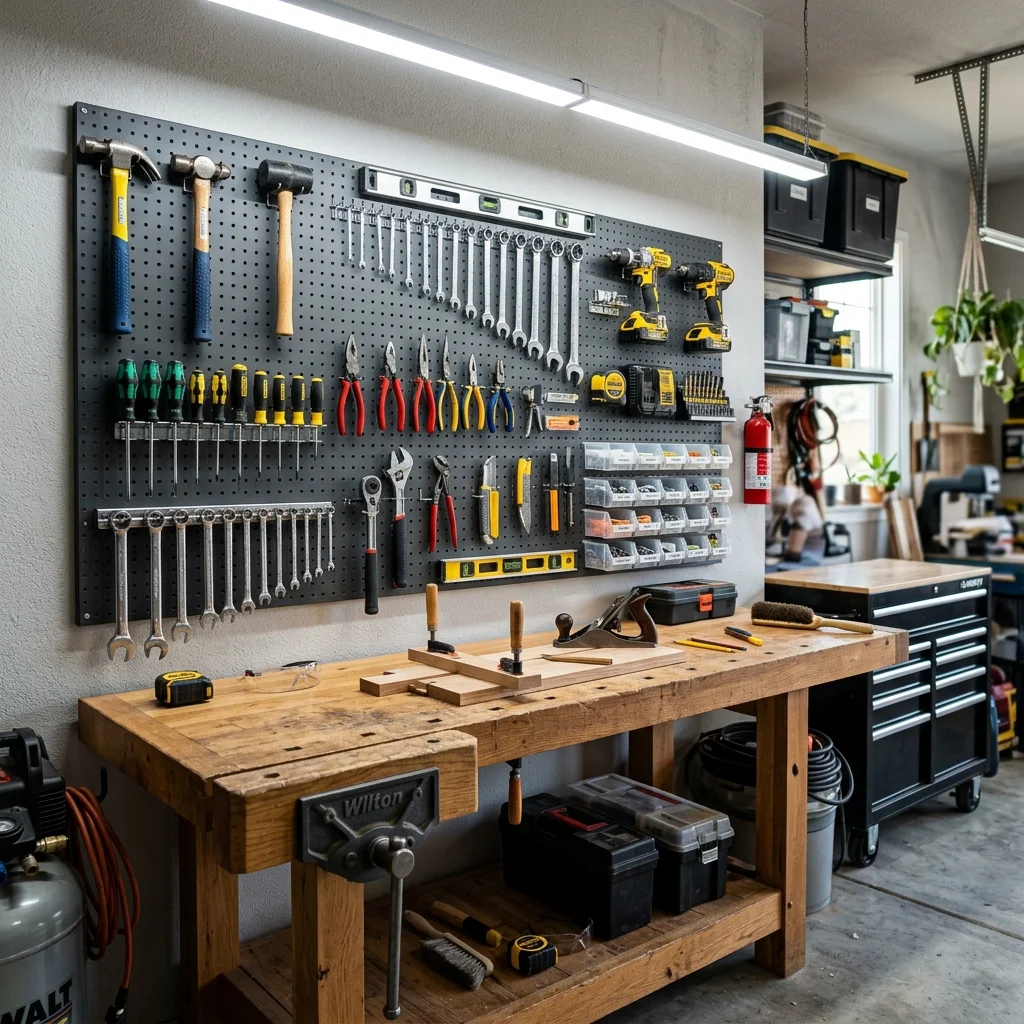
To keep your garage workspace organized, consider installing a pegboard on one of your walls. This will allow you to hang your frequently used tools, such as hammers, screwdrivers, and wrenches, within easy reach.
The truth is, a pegboard can be a game-changer for any DIY enthusiast, providing a dedicated space for your tools and keeping them off the floor.
For this project, you’ll need:
-
- 1 pegboard (4×8 feet)
- 1 package of pegboard hooks
- 1 drill
- 1 level
- 1 hammer
- 1 tape measure
- Wood screws
With a moderate skill level and about 2-3 hours of work, you can complete this project.
Here’s a step-by-step guide:
-
- Measure the space where you want to install the pegboard
- Mark the wall with a level to ensure straight installation
- Drill pilot holes and screw the pegboard into place
- Install the pegboard hooks and hang your tools.
Overhead Storage Racks for Infrequently Used Items
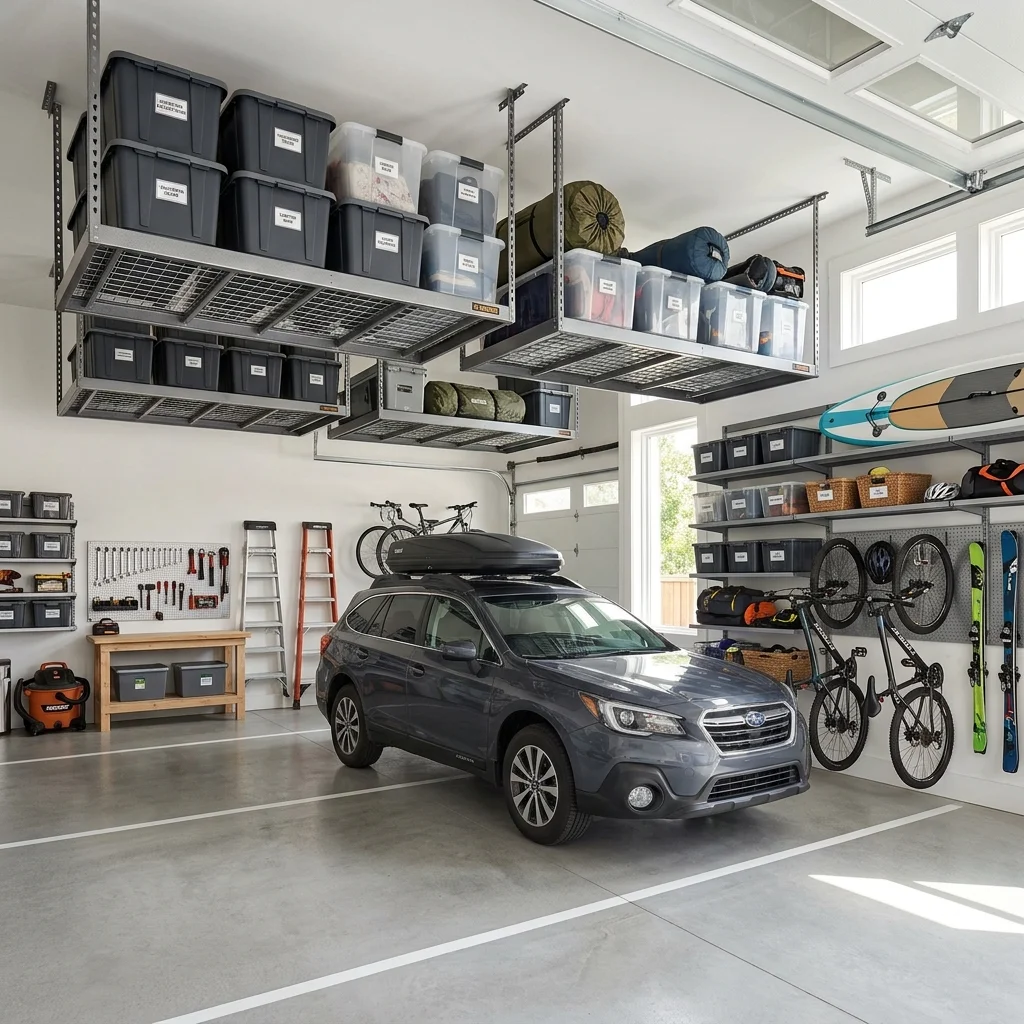
To maximize garage space, consider installing overhead storage racks for items you don’t use often.
The truth is, most people miss the opportunity to utilize their garage’s vertical space.
For this project, you’ll need:
-
- 2×4 lumber
- Plywood
- Screws
- Drill
- Level
- Measuring tape
- Safety glasses
This DIY garage organization idea requires a medium skill level and about 4-6 hours to complete.
Here’s a step-by-step guide:
-
- Measure the space where you want to install the rack
- Cut the lumber to size
- Assemble the rack frame
- Attach the plywood shelf to the frame
For example, a 4×4 foot overhead storage rack can hold about 10-15 storage bins, keeping your garage floor clutter-free.
FAQ
What is the best way to get started with DIY garage organization?
To begin, assess your garage space and identify areas that need the most attention. The truth is, most people miss the importance of measuring their space before starting a project. For example, a 2-car garage can be transformed with a custom storage system. Start by gathering materials like lumber, plywood, and storage bins.
How much time and money can I expect to spend on a DIY garage organization project?
Generally, a simple storage rack can be built in about 2-3 hours with a budget of $50-$100. Most people can complete these projects with basic DIY skills, such as measuring, cutting, and assembling. A full materials and tools list may include a drill, saw, and screws.
What skill level is required for DIY garage organization projects?
Basic DIY skills are sufficient for most projects, but some may require intermediate skills, such as plumbing or electrical work. For instance, building a workbench with a vice may require more advanced skills. A time estimate for this project could be 4-6 hours.
Can I use recycled materials for my DIY garage organization project?
Repurposing old materials is a great way to save money and reduce waste. Consider using old pallets or wood crates to build a shelving unit. With a few simple tools like a hammer and nails, you can create a unique and functional storage solution.
What are some essential tools and materials I’ll need for DIY garage organization projects?
A full materials and tools list may include items like a drill, saw, plywood, lumber, and storage bins. For a custom overhead storage rack, you’ll need 2x4s, 3/4 inch plywood, and screws. With these materials and tools, you can build a sturdy and functional storage system that maximizes your garage space.
Key Takeaways
To recap, effective DIY garage organization requires careful planning and execution.
Consider a full materials and tools list, including a drill, saw, plywood, lumber, and storage bins, to ensure a smooth project flow.
Some key points to keep in mind:
-
- Start with a clear vision of your garage space and needs
- Set a realistic budget and timeline, such as 2-3 weekends for a basic project
- Gather all necessary materials and tools before beginning
- Follow step-by-step instructions, like the 5-step process for building a custom overhead storage rack
- Consider your skill level, such as beginner or intermediate, to choose the right project
- Don’t forget to measure twice, to avoid costly mistakes and ensure a perfect fit.
The truth is, a well-organized garage can increase your home’s value by up to 10%.
Save this article to your DIY Garage Organization board on Pinterest to get started on your project today and maximize your garage space!